How to Draw a Steamshower in Floor Plan View
The data in this article applies to:

QUESTION
I demand to create a steam shower in a bathroom and I need to brand the walls vapor-resistant. How practice I design this in my software?

ANSWER
In Chief Architect, it's like shooting fish in a barrel to setup a custom wall type for rooms such every bit a steam shower. In this commodity we will prove y'all how to define a vapor-resistant wall blazon, and how to design this mode of shower.
To define the wall types
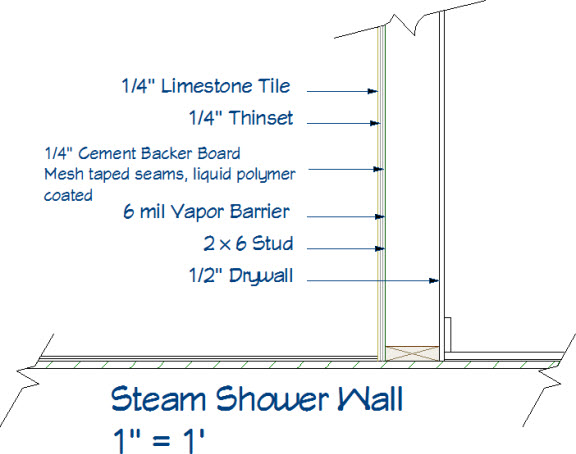
A vapor-resistant wall needs to at least run across the post-obit criteria in the most common cases;
- A surface layer of tile.
- A layer of thinset mortar.
- Cement Capitalist Board with mesh taped seams.
- Vapor barrier.
- Stud framing.
- Drywall.
The wall type shown in this article is based on the common structure for a wall of this type. It is always best to refer to the edifice codes in your surface area for the correct construction of a vapor-resistant wall.
- Navigate to Build> Wall> Define Wall Types
 from the bill of fare.
 - In the Wall Blazon Definitions dialog that displays, click theNewpush button to create a new wall type.
- Proper name this wall Steam Shower - Interior, add five additional layers by selecting the Insert Below push, and define the wall as follows:
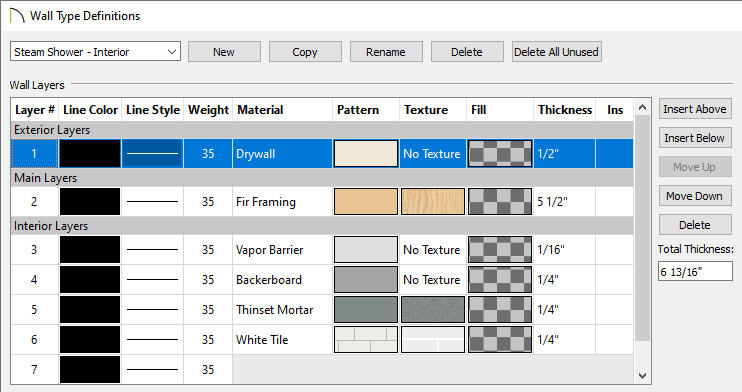
- Exterior Layers
- Layer 1: Drywall - ane/2".
- Layer 1: Drywall - ane/2".
- Primary Layers
- Layer ii: Fir Framing - 5 ane/two"
- Layer ii: Fir Framing - 5 ane/two"
- Interior Layers
- Layer iii: Vapor Barrier - 1/16"
- Layer 4: Backerboard - 1/four"
- Layer 5: Thinset Mortar - ane/4"
- Layer 6: Tile of your choosing - 1/four"
- Layer iii: Vapor Barrier - 1/16"
- Exterior Layers
- Repeat the process to create a second wall blazon. This wall type however, will exist called Steam Shower - Exterior and the Outside Layers section will take a siding fabric layer, along with an OSB layer, instead of drywall.
You are now ready to draw your bathroom and steam shower. In this example, we volition start with the standard default wall tools, then modify the bathroom walls to use the new vapor-resistant wall type(s) mentioned above.
Annotation: You may receive the following alarm for the Steam Shower - Interior wall type:
"The wall layers but defined take drywall on the exterior of what appears to exist an exterior wall. Are these layers defined correctly? The outside layer should be at the top of the diagram."
This merely means that the program sees the wall type created contains characteristics of an exterior wall, which would non typically have the exterior layer to be fabricated of drywall. You can safely click OK and continue with the rest of this article.
To draw a steam shower
- Select Build> Wall> Straight Exterior Wall
 and/or Straight Interior Wall
  from the carte, then draw an area to represent the bathroom.
- Using the Select Objects
 tool, select the room and click the Open Object
 edit tool.
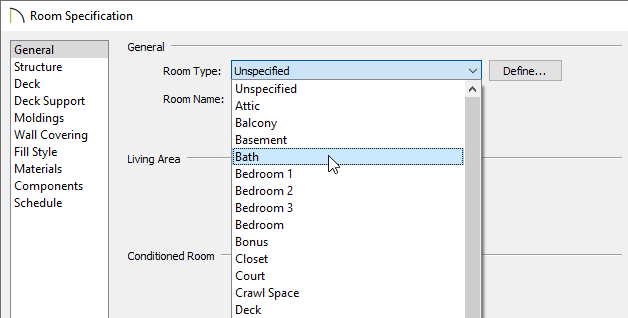
 - On the General panel of the Room Specification dialog that displays, modify the Room Type to Bath, then click OK.
- Adjacent, navigate to Build> Wall> Directly Glass Wall
 or Direct Glass Pony Wall
  from the carte, and add ii additional walls in the corner to form the area that will serve as the steam shower.
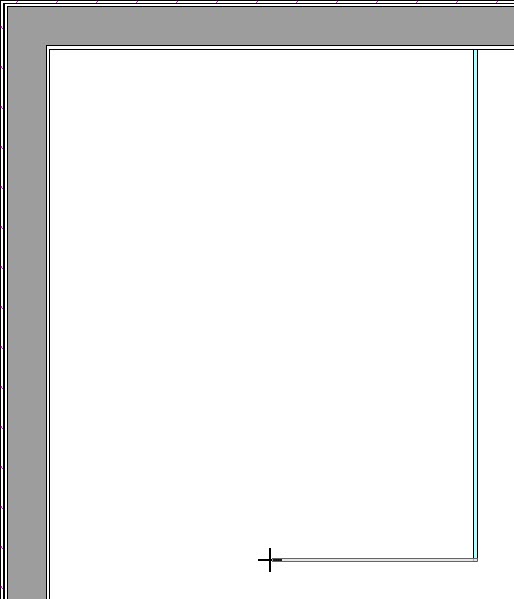
- Navigate to Build> Door> Shower Door
 and click along one of the glass shower walls to place a shower door.
Select and open up the Glass Shower Door to specification to make size modifications, modify the applied hardware, adjust arch properties, or to change other characteristics such every bit the type of drinking glass that is used.
- Select the left, vertical wall using the Select Objects tool, click on the Break
 edit button, then click once where the drinking glass shower wall intersects the exterior wall. A break line volition exist created separating the wall in to 2 split up segments.
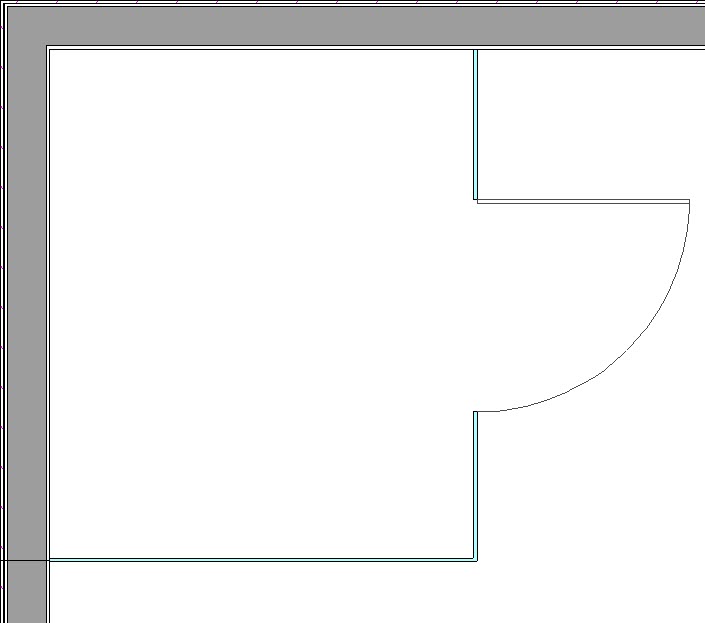
- Place an additional break indicate on the superlative horizontal wall where the glass shower wall intersects.
- Adjacent, select the left, vertical wall segment that is part of the shower, Open up it to specification, and on the Wall Types panel of the Wall Specification dialog, modify the Wall Blazon to the Steam Shower - Exterior wall type that was created earlier in this article.
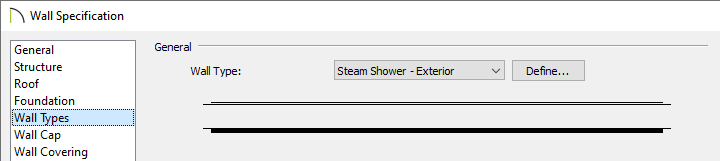
- Perform the same procedure to change the top horizontal wall that'due south part of the shower to use the Steam Shower - Interior wall type. Exercise this only for walls that will be shared with other rooms in the construction.
Your program may at present await similar to the paradigm below.

Nosotros are now ready to accommodate the floor and ceiling properties of the steam shower.
To define the flooring and ceiling
- Using the Select Objects tool, select the steam shower room and click the Open Object edit tool.
- On the Structure panel of the Room Specification dialog that displays:
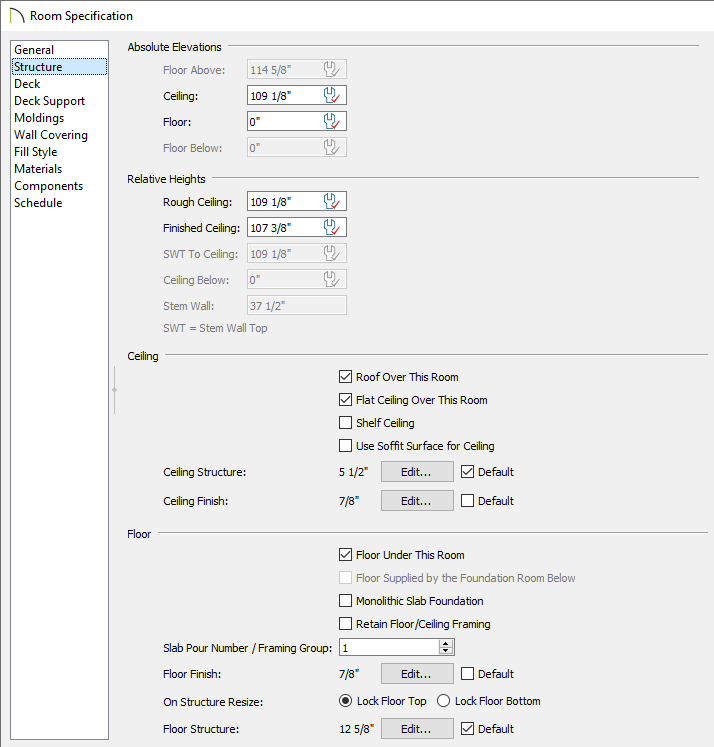
- Suit the Ceiling height of the steam shower to your liking.
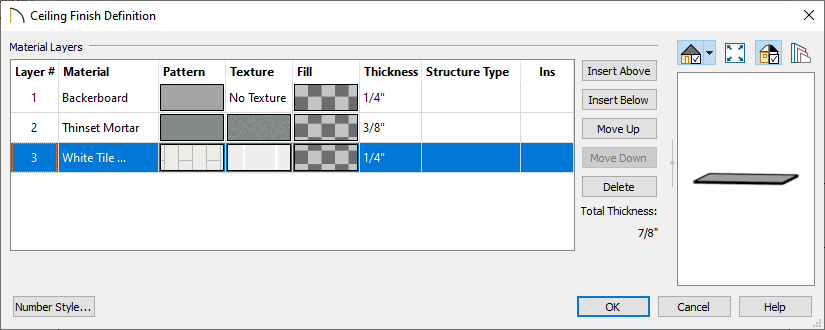
- Click the Edit button next to Ceiling Finish to open up the Ceiling Stop Definition dialog, modify the layers until the ceiling finish of the steam shower is to your liking, then click OK.
- Do the same affair with the floor past selecting the Edit push next to Floor Finish, modifying the floor end layers to your liking, and then clicking OK.
- In some cases, a sloped ceiling is generated for steam showers to prevent dripping in unwanted areas due to condensation. If you would like to have a sloped ceiling above the steam shower, uncheck the Flat Ceiling Over This Room checkbox and the ceiling will follow the pitch that is specified for the roof.
Note: If boosted ceiling plane modification is desired, please see our Ceiling Videos Playlist to acquire how to create and modify custom ceiling planes.
- On the Moldings panel, add or remove any moldings to the shower, so click OK to confirm the changes and close the dialog.
- Add together any additional Library
 accessories to the shower such as faucets, drains, and shower heads.
- Faucets tin exist located at Chief Architect Core Catalogs> Architectural> Fixtures> Faucets, while drains can exist located at Chief Builder Core Catalogs> Architectural> Fixtures> Drains and Fittings.
- Shower pans tin exist located at Principal Architect Cadre Catalogs> Architectural> Fixtures> Showers> Shower Pans.
- Steam shower components such equally steam heads, ports, glass wall components, and control panels can be located in the Bathroom Fixtures No.4 Shower Hardware bonus catalog located in the 3D Library.
- Additional sauna accessories such as benches and other seating components can exist located in the Poolside and Sauna bonus catalog located in the 3D Library.
- Lastly, create a Camera
 view to see the results.
Source: https://www.chiefarchitect.com/support/article/KB-02820/creating-a-steam-shower.html
0 Response to "How to Draw a Steamshower in Floor Plan View"
Post a Comment